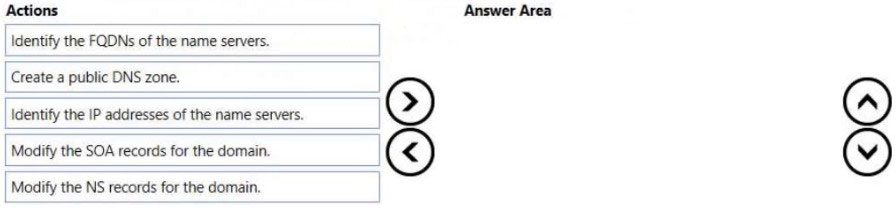
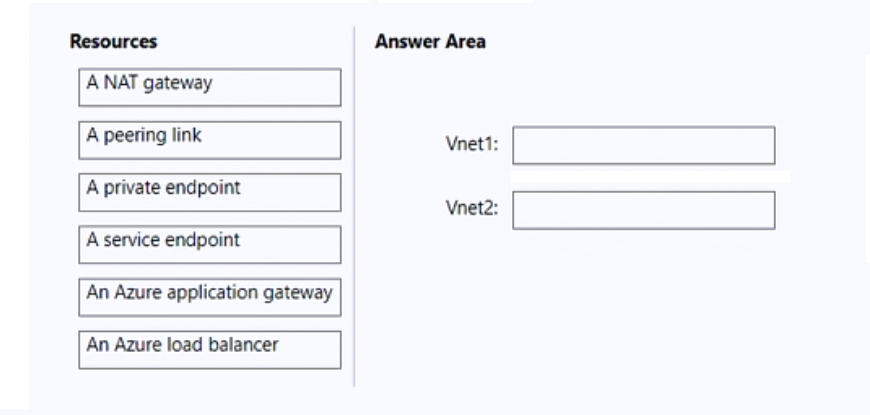
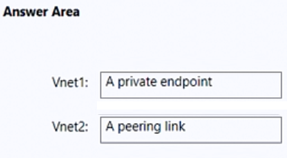
Step 1: Create a public DNS zone.
Create a DNS zone -
1. Go to the Azure portal to create a DNS zone. Search for and select DNS zones.
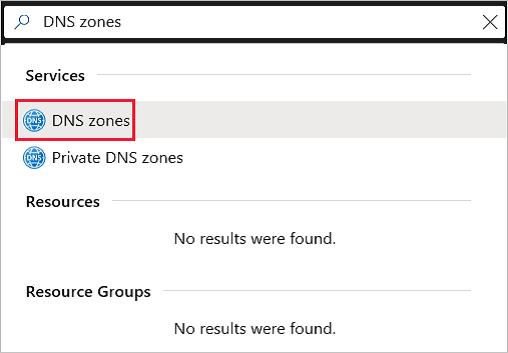
2. Select Create DNS zone.
3. On the Create DNS zone page, enter the following values, and then select Create.
Step 2: Identify the FQDNs of the name servers.
Retrieve name servers.
Before you can delegate your DNS zone to Azure DNS, you need to know the name servers for your zone. Azure DNS gives name servers from a pool each time a zone is created.
With the DNS zone created, in the Azure portal Favorites pane, select All resources. On the All resources page, select your DNS zone. If the subscription you've selected already has several resources in it, you can enter your domain name in the Filter by name box to easily access the application gateway.
Retrieve the name servers from the DNS zone page. In this example, the zone contoso.net has been assigned name servers ns1-01.azure-dns.com, ns2-
01.azure-dns.net, *ns3-01.azure-dns.org, and ns4-01.azure-dns.info:
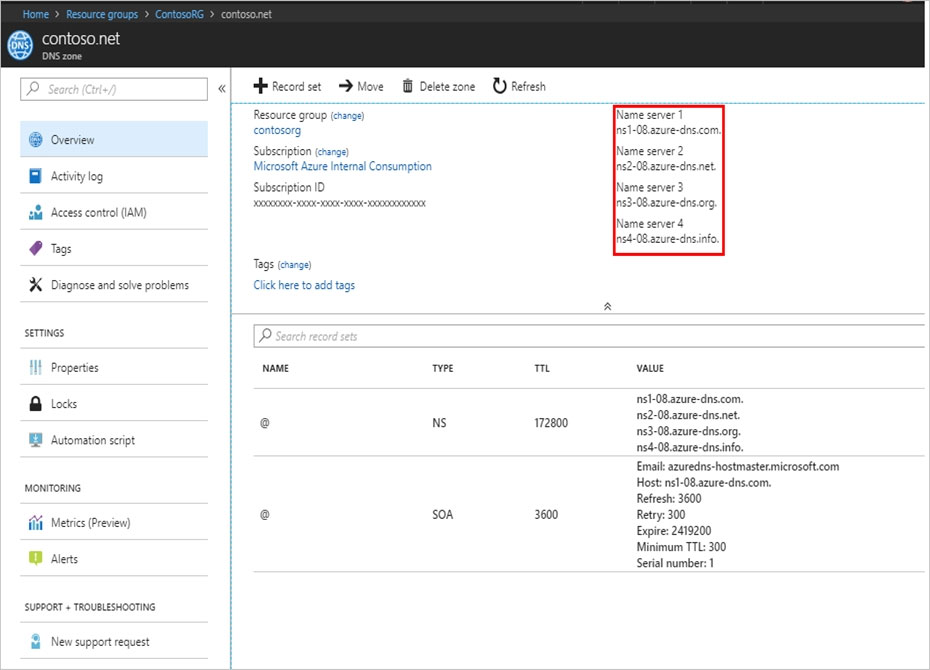
Azure DNS automatically creates authoritative NS records in your zone for the assigned name servers.
Step 3: Modify the NS records for the domain.
Delegate the domain -
Once the DNS zone gets created and you have the name servers, you'll need to update the parent domain with the Azure DNS name servers.
Each registrar has its own DNS management tools to change the name server records for a domain.
1. In the registrar's DNS management page, edit the NS records and replace the NS records with the Azure DNS name servers.
2. When you delegate a domain to Azure DNS, you must use the name servers that Azure DNS provides. Use all four name servers, regardless of the name of your domain. Domain delegation doesn't require a name server to use the same top-level domain as your domain.
Reference:
https://docs.microsoft.com/en-us/azure/dns/dns-delegate-domain-azure-dns