Scenario: Implement Project3, Project5, Project6, and Project7 based on the planned changes

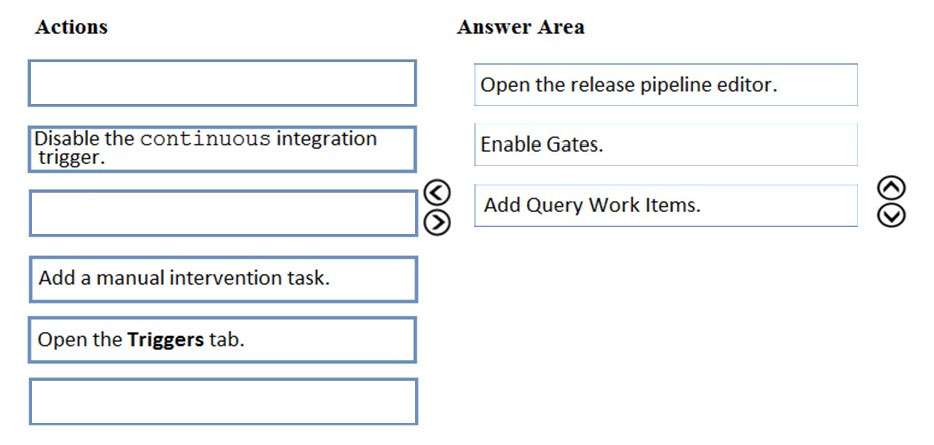
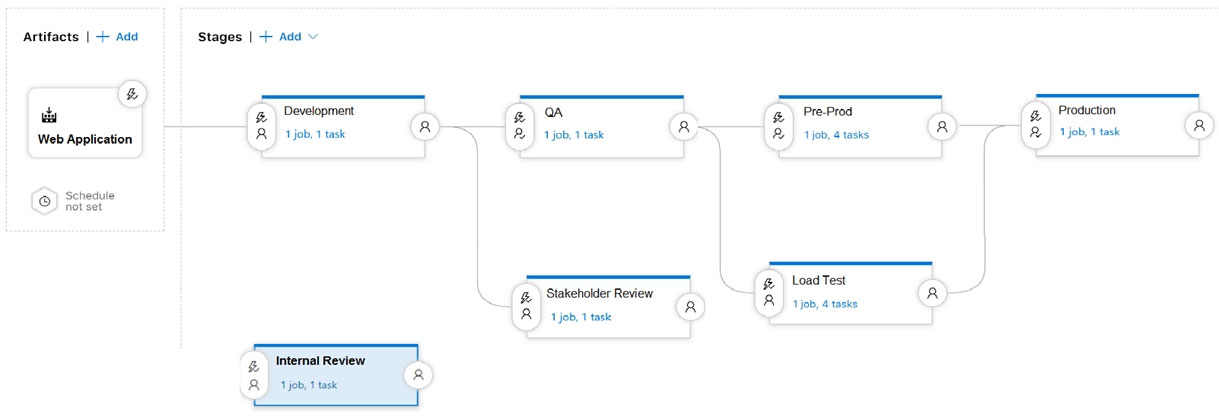
Step 1: Open the release pipeline editor.
In the Releases tab of Azure Pipelines, select your release pipeline and choose Edit to open the pipeline editor.
Step 2: Enable Gates.
Choose the pre-deployment conditions icon for the Production stage to open the conditions panel. Enable gates by using the switch control in the Gates section.
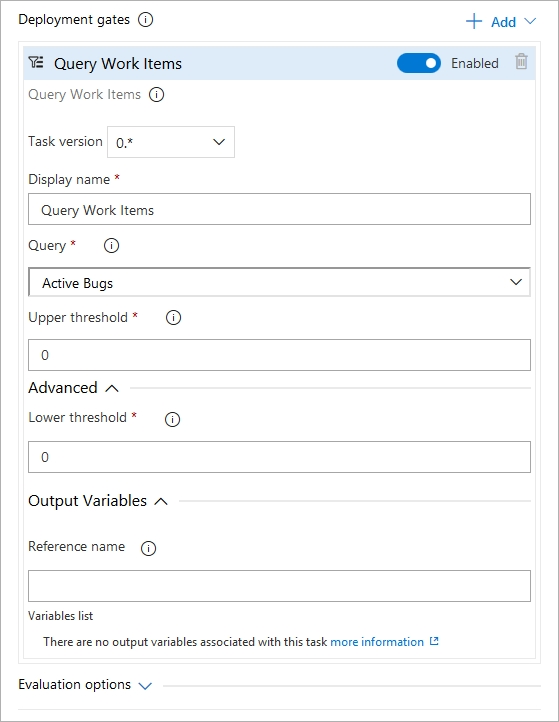
Step 3: Add Query Work items.
Choose + Add and select the Query Work Items gate.
Configure the gate by selecting an existing work item query.
Note: A case for release gate is:
Incident and issues management. Ensure the required status for work items, incidents, and issues. For example, ensure deployment occurs only if no priority zero bugs exist, and validation that there are no active incidents takes place after deployment.
References:
https://docs.microsoft.com/en-us/azure/devops/pipelines/release/deploy-using-approvals?view=azure-devops#configure-gate
Implement Dependency Management