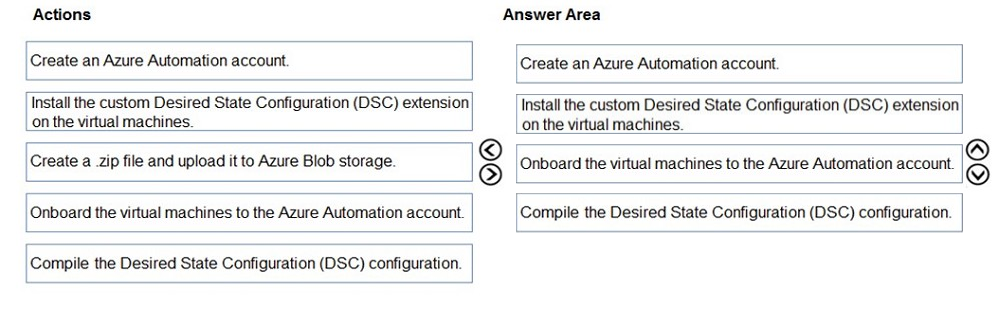
Set up staging environments in Azure App Service
1. Open Microsoft Azure Portal
2. Log into your Azure account, select your app's resource page, in the left pane, select Deployment slots > Add Slot.

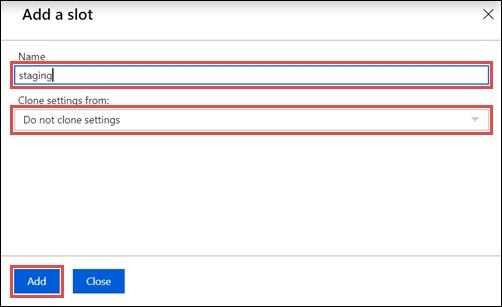
3. In the Add a slot dialog box, give the slot a name, and select whether to clone an app configuration from another deployment slot. Select Add to continue.

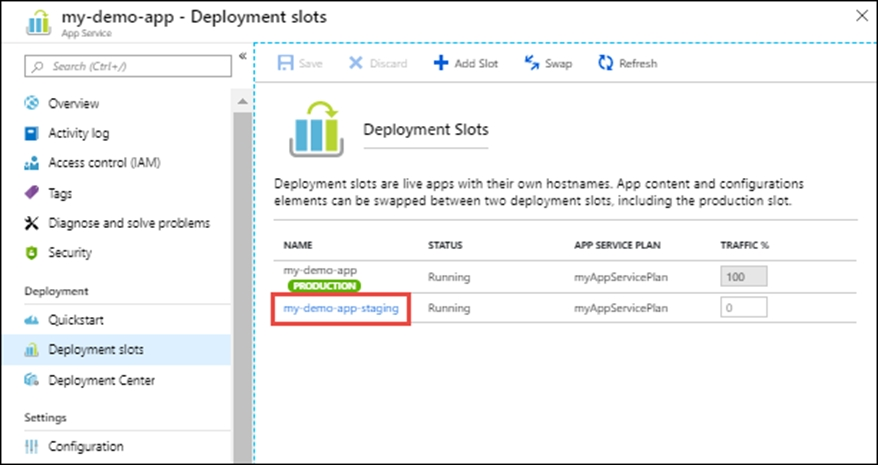
4. After the slot is added, select Close to close the dialog box. The new slot is now shown on the Deployment slots page. By default, Traffic % is set to 0 for the new slot, with all customer traffic routed to the production slot.
5. Select the new deployment slot to open that slot's resource page.

6. Change TRAFFIC % to 10
Reference:
https://docs.microsoft.com/en-us/azure/app-service/deploy-staging-slots